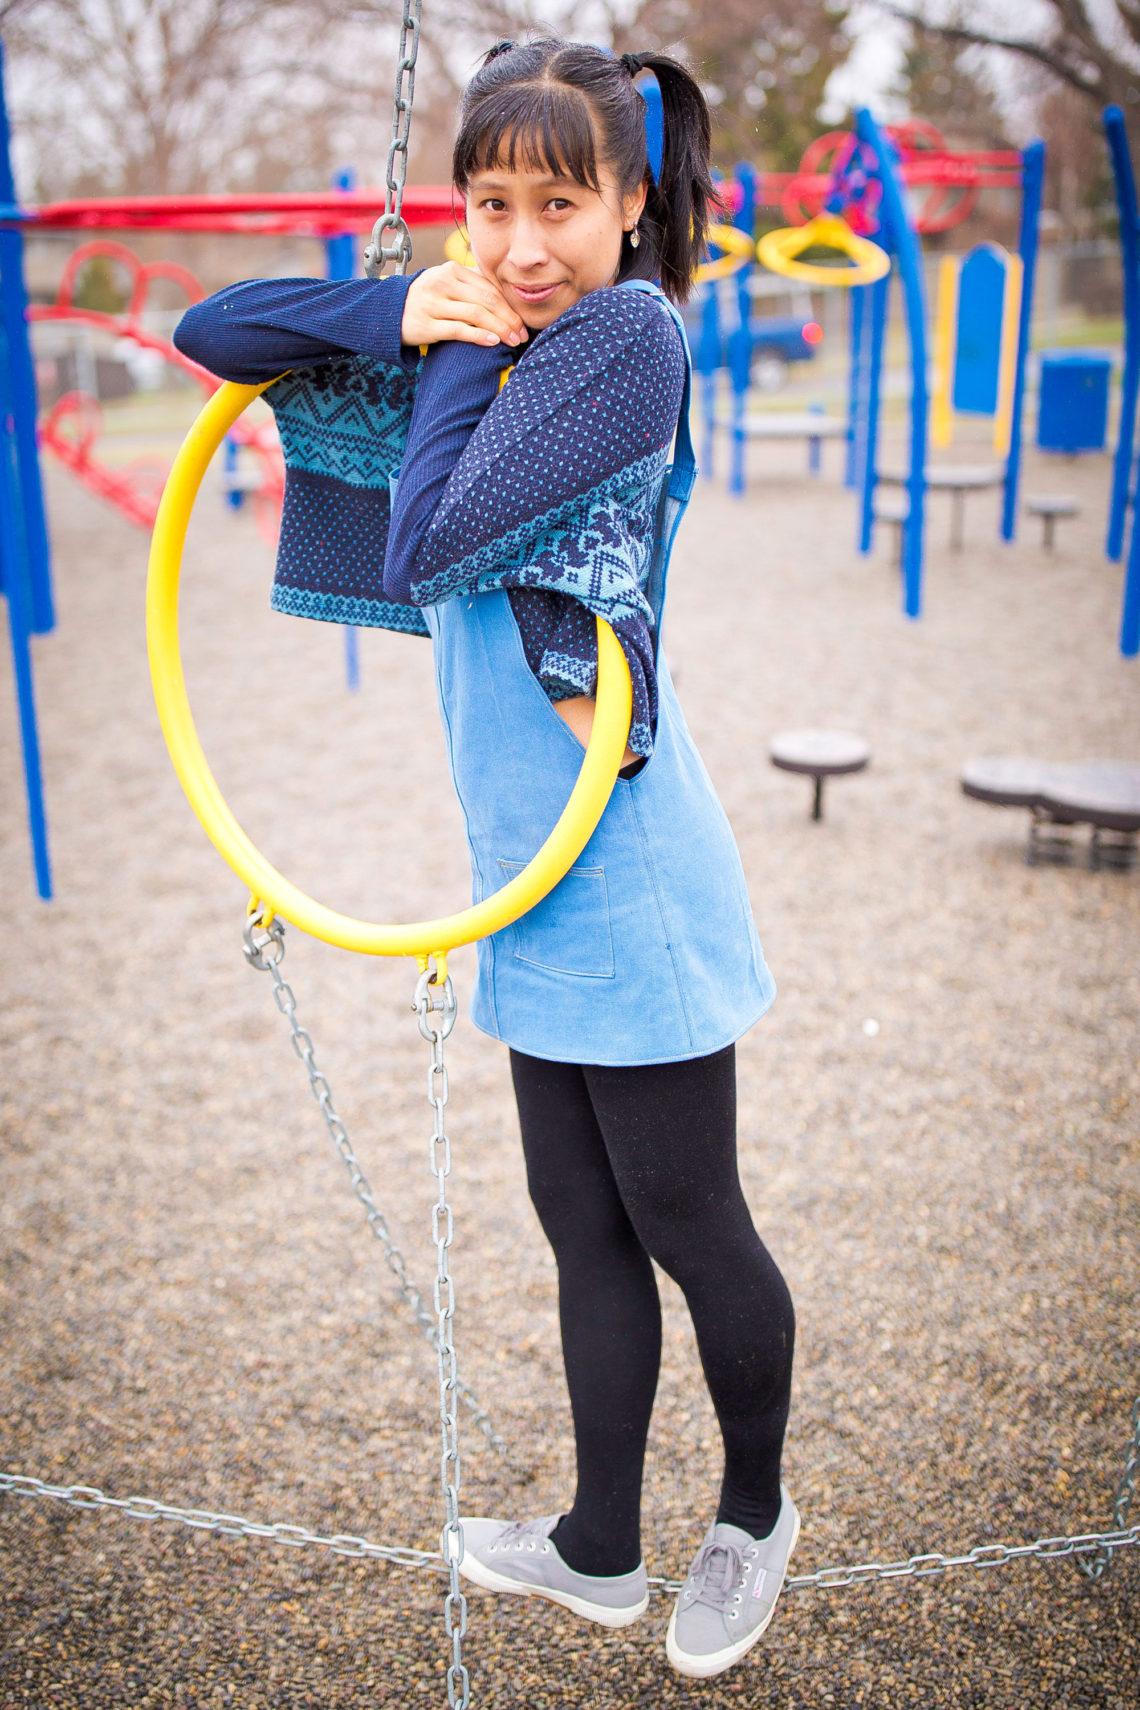
Jeans to Overalls
Oh my gosh, I’m almost afraid to say it, but I think Spring may actually be a thing here in Calgary. I’m crossing my fingers! I don’t think I can handle another weekend of snowfall! That would be ridiculously Calgary. T_T
So, I’m hoping my #memademay project this week gets to see some sunshine and green grass. Unfortunately, this outfit has only known winter.
This is another ‘pant to something’ project that is going to be similar to April’s DIY. You can check it out here. The only challenge I can see here is making sure that you have the right needle for denim. It took me a couple of tries before I got the thread to behave. So, with that note, make sure to use scrap fabric before you start sewing on the real deal!
May the odds be ever in your favor.
DIY Level – 2
What you’ll need:
- Pair of jeans that’s larger by a few sizes and has contrasting thread details on the side seams.
- Hardware for adjusting the straps
Key features – Overalls, pockets, hardware
(insert before and after here)
The Legs
Choose a pair of pants that are a few sizes too big. This will ensure that it will fit over them hips.
To start, fold the pants in half lengthwise. Cut across the legs, just below the crotch. This doesn’t have to be perfect, but if you are a stickler like me, you can make sure the cut is parallel to the hem of the pants. Set the top of the pants aside.
Working with the two legs, seam rip the inner leg seam/inseam and the hem. Do not seam rip the side seams/contrasting detailed side. The side seams will become the center front and back of the overalls.
Seam rip all the pieces.
There will be:
- Left leg
- Right leg
Iron the two legs open and lay flat.
The Front Panel
Before deciding on anything, match the pieces, good sides together. Now, flip the whole thing over. The hem of the pants will be the top, and the newly cut part will become the bottom of the overalls.
Turn the stitch dial to 4, or highest stitch length. Use a straight line to baste stitch the side seams together. Do not back stitch! This will be a temporary stitch and will be removed. Sew from the bottom of the fabric to about ⅓ of the way up on both sides. Alternatively, you can measure your hips and sew up to that length. Throw it on inside out and see if you like where it sits. You may want to reduce how much is sewn due to fit, or increase it. Mark this point. Don’t worry if the bottom flares out unevenly, they weren’t meant to sit this way. It will be adjusted later.
While you still have it on, mark how low the curve of the front neck should be, where the straps will sit/distance, strap thickness, and the depth of the side curve. I used pins for quick reference.
In my overalls, the measurements are (not including seam allowance):
- Neckline is 4 inches deep
- Strap distance is 8 inches across
- Strap is 1.5 inches thick
- Side seam goes down 16 inches
Be careful when removing the dress to be. Getting stabbed by a pin sucks enough, getting stabbed by multiple pins will suck even more!
Keep the dress inside out. Working with the front panel only, fold it in half. Using the pins as reference, use a fabric pen, or marker that will wash off, or not stain, (who am I kidding? I just use pencil) connect the bottom of the neckline to the inner side of the strap with a curved line. This part can be altered to your liking. If you want the neckline to square out, do that instead of a curved line. Make sure both sides are equal. Make sure to include seam allowance all around for a clean finish.
For the outside of the straps and side seams, connect the depth of the side seam to the outside of the strap. Add seam allowance.
Remove the basting stitch that holds the front and back pieces together.
Fold the front piece in half, and cut along the lines that were just created to create the front look.
NOTE: Make sure to bring the stitch length back from 4 to 2.5, or whichever stitch length works for your denim. Test out small pieces of scrap fabric before sewing on the dress.
Use contrasting thread similar to the thread of the center front, sew down the seam allowance all the way around the top and sides. It may get tricky when you are sewing over the center because of the thick seam. I used the hand crank to get past this point. Careful not to break your needle!
The Back Panel
For the back piece, I decided to square it out, but to the same depth, and width of the front. You can choose to curve it out like the front and simply trace out the front piece. When creating the curve on the side seam, make sure it matches up with the front panel. These side seams will be sewn together.
Sew down the raw edges of the top and sides, just like you did for the front piece.
Pockets
If you decided to go with the straight back, there will be enough scrap fabric to make front pockets. Because I want to use up as much fabric as possible, I decided on square pockets.
Using the rectangle scrap piece, seam rip down the middle where the seam is. Cut them to the same size. Iron them out, then iron down all the raw edges inside, on the bad side of the fabric for a clean look.
For the top of the pocket, sew two straight lines parallel to each other. I added this for some interesting detail. You can choose to do different designs, just make sure the seam allowance is folded over and caught in the sewing.
Pin the pockets to the bottom front, or anywhere you wish. Carefully sew a straight line on the rest of the edges. Pockets!
Straps
Use 4 long curved pieces of scrap fabric; these pieces are originally from the sides of the front and back. Cut them all to the same width. Hopefully, they will be the same width of the front straps when folded in half lengthwise, including seam allowance. Make sure 2 pieces are the same length, and the other two pieces are the same. It doesn’t matter which set of two are shorter or longer, as long as they are the same as their friend. Sew one long and one short piece together to create one long strap. Iron open this seam. Fold the strap in half lengthwise and sew a straight line from top to bottom. Iron this seam open. Ironing this part is not necessary, but will go a long way when ironing the lumps out later.
Now, this is where patience is key. The denim will definitely not be kind. Grab a safety pin, or something stronger, I ended up using a decorative knitting safety pin to thread through the straps and turn them inside out. Slow and steady, it will pay off!
Once the strap has been reversed, iron it down with the seam in the middle of one side. This will be the bottom/underside of the strap. Tuck in both ends on themselves and use a straight stitch to sew these closed.
Do this all again with the other strap.
Match the straps up to the inside of the back piece. Sew a box with squares on the good side, making sure to catch the straps underneath.
Hardware
For the complete overall look, insert the hardware as directed on your packaging. There should be a set of buttons for the front, a set that hooks up to those buttons, and one last set of rectangular pieces with several areas to thread the straps through.
Front and Back Meet Again
Good sides together, match up the side seams and sew a straight line. Try it on for good measure and see where you want it to sit. Iron the hem up and sew a straight line.
If you guys have any questions, please let me know!
Be sure to tag me on IG if you make this with #eccentralitymade
We crushed it! Enjoy the new overalls!
Love what you’ve got, reimagine what you have – Thanh
PS. That’s not dandruff in my hair, well, not all of it. It legit snowed last weekend when I took these photos!
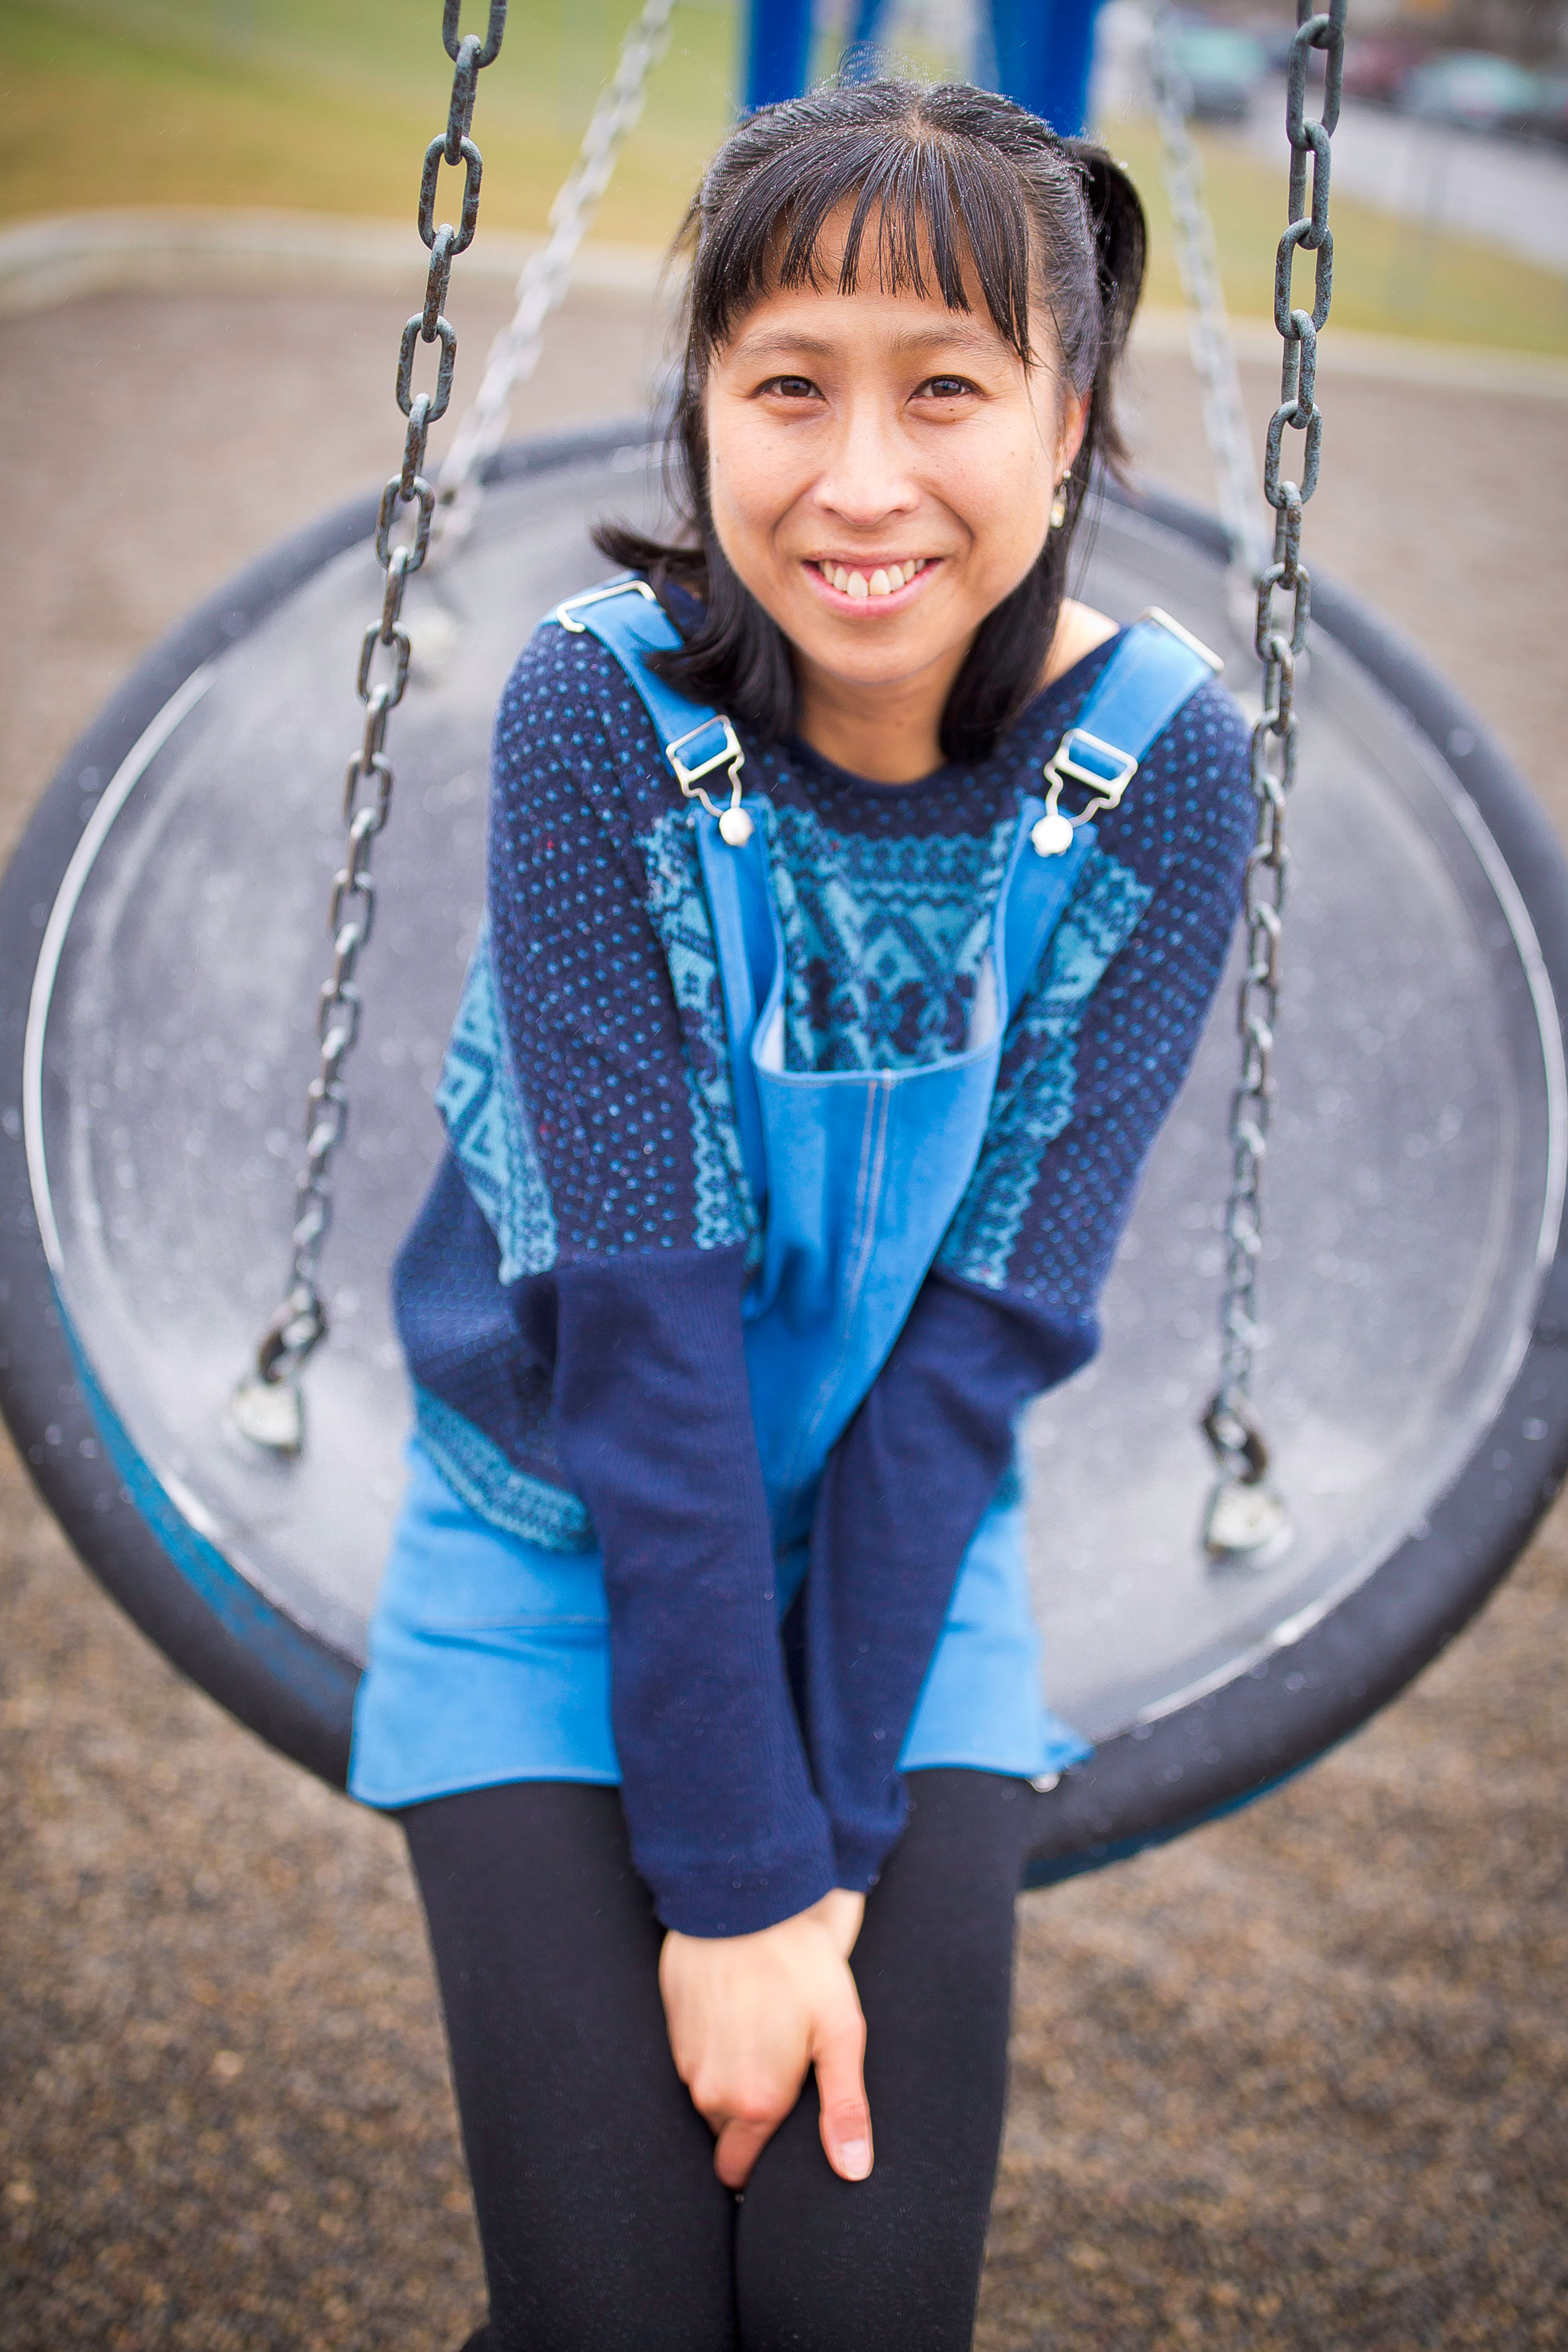
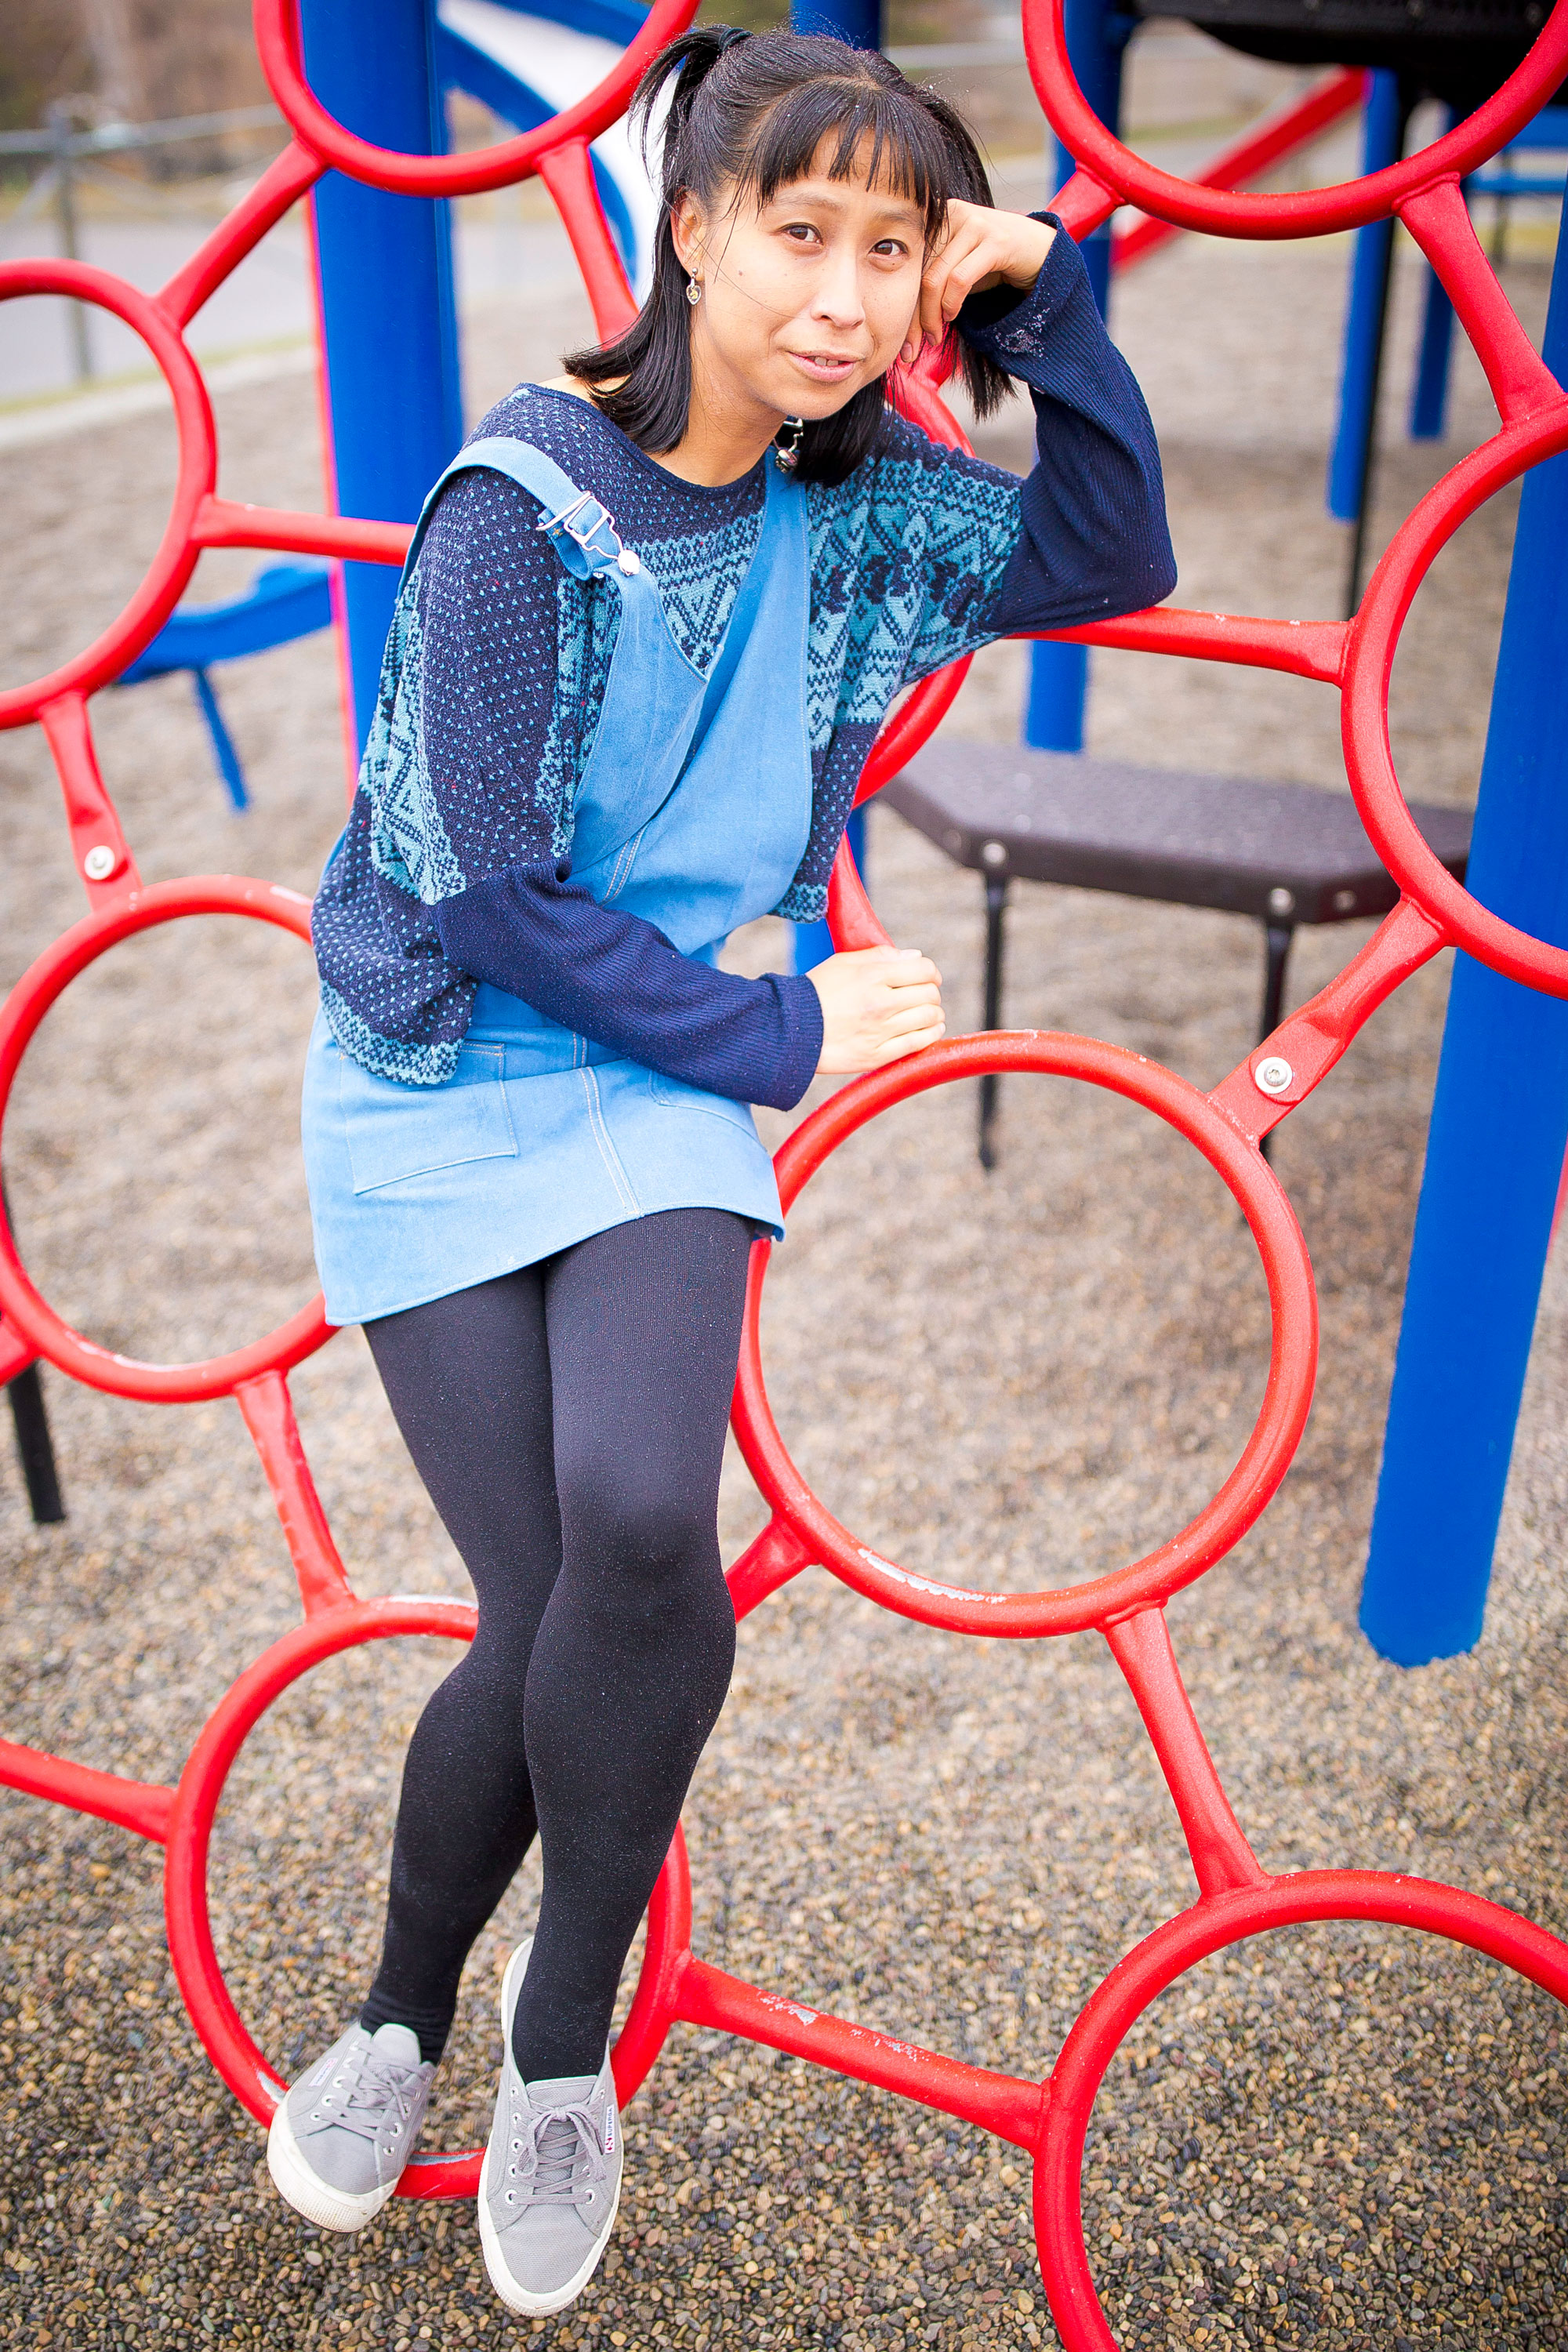

Loose Knit Blue Top – Owned since 2015
Black Tights – Owned since 2014
Grey Casual Shoes – Clothing swap in 2019
Overall Dress – Refashioned from jeans in 2019
Photos – David Vetrovs
Editor – Melissa Martland
Styling – Thanh Nguyen