Flannel Shirt to Skirt
So, I don’t know about where you are situated, but here in Calgary, winter has made a big return. *Insert ugly cry face here* Why?!
Well, what can you do? I guess we can wear our favorite fall/winter clothes a little longer, that is if you’re looking at the bright side, or in this case, the snow-covered side… *queue booing here*
Or, you can stay indoors and try your hand at remaking an old flannel top into a midi skirt! I prefer the latter.
Let’s get into it!
I would say this is a level 2 sewing challenge (out of 3). Level 4 patience challenge (out of 5). All the seam ripping will turn you into a saint of patience – if you get through it all!
DIY Level – 2
What you’ll need – Button up shirt that fits loose or larger.
The measurements needed – waistline. Mine is 29 inches.
Key features – Ruffle skirt, button up front
1 – Seam rip all the pieces. There will be:
- 2 front pieces
- 1 back piece
- 2 sleeves
- 2 cuffs
- 1 collar
- 2 pockets
Creating the Ruffle Skirt
To create the full ruffle skirt, sew one side of each sleeve, onto each side of the back. Make sure to place the cuff of the sleeve at the armhole, and the curve of the sleeve (aka sleeve head) will sit at the hem/bottom of the back piece. This is done to ensure there is lots of fabric for the ruffle.
Line up the seams from top to bottom. If the sleeve side seam extends past the side seam of the back piece, that’s okay, the bottom will be hemmed later. Use a straight stitch and sew the seams together.
Do the same with the other side of the sleeves, but with the 2 front pieces. Match side seams up from armhole to hem. The button up part of the shirt will become the front of the skirt.
You should have one big piece once this is all done. When opened, it should be in this order: front panel, sleeve, back panel, sleeve, front panel.
Cut off the tops of the front and back panel to make the waistline even.
On your sewing machine turn the stitch dial to 4, or the biggest stitch length. Leave a tail on both ends, or a lot of extra thread hanging on the ends. Following the top of the skirt, baste stitch a straight line. Do not back stitch on either side. Create the ruffle by pulling on one thread and evenly distributing the ruffles throughout the skirt. Ruffle to the measurement of your waist.
My measurement is 29 inches.
Waistband
For the waistband, use the cuffs and some leftover fabric.
Connect the cuffs together via the button closures. Seam rip the other side of the cuffs to the top of the curve. This will be the front of the waistband.
Using scrap fabric we will make the back of the waistband. Cut it the width of the cuffs, and the length (waist) of the skirt minus the length of the cuff. Add ⅝ inch seam allowance all around. This will be the back of the waistband.
Width = Cuff width
Length = Waistline – (minus) cuff length
Add ⅝ inch all around the rectangle piece
To complete the waistband, sew the open sides of the cuffs to one end of the back waistband piece by laying both parts open, good side up. Lay the back piece under the front piece. Follow the stitch lines of the original cuff. Do this to both sides. Make sure the length of both pieces combined match the waist on the skirt. Fold in half lengthwise and iron down the whole waistband.
Attaching the Waistband to the skirt:
Match one side of the waistband to the front of the skirt, good sides together. Use a straight stitch to sew this together.
Turn the waistband up, iron the new seam, making sure it’s ironed up into the waistband. There is still one side of the waistband that needs to be attached. Iron this end up a little less then ⅝ of an inch or even half of that.
This is the tricky part. Pin the other side of the waistband to the rest of the skirt. Position the skirt on the sewing machine, finished/good side up. I know you won’t be able to see the other side of the waistband. It’s okay, hopefully, the pinning job we just did will keep it in place and catch it all.
Sew in the ditch. Sew right in the seam where the front of the waistband and skirt meet. This will (cross your fingers) catch the other side of the waistband to complete the waistband and skirt part.
Hemming the Bottom
Hemming and clean finishes have already been done for the most part. The curved part of the old sleeves needs to be cut and hemmed to match the rest of the skirt. You can decide how much curve you want to keep; I tried to match the rest of the skirt hem, using a rolled hem to finish the rest of the skirt. To do this fold the raw edge over once, then again for a second time. The second time should hide the raw edge. Sew a straight line on the edge of the second fold.
Voila, a ruffle skirt from an old shirt. What a nice little rhyme too! Wow, I need to work on my exit. Haha!
Please let me know in the comments below if there are any questions regarding this tutorial. I will do my best to answer them!
Be sure to tag me on IG if you make this with #eccentralitymade
Love what you’ve got, reimagine what you have – Thanh


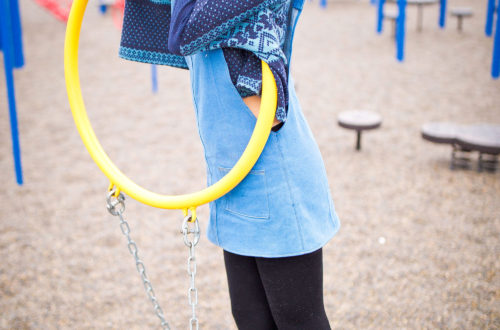
Black Crop Top – Clothing swap 2018
Plaid Navy Skirt – Refashioned from flannel shirt 2019
Black Tights – Owned since 2014
Purple Booties – Owned since 2018
Photos – Kyle Estrella
Editor – Melissa Martland
Styling – Thanh Nguyen